(TCBTB)

Showing posts with label room of unrest. Show all posts

Monday, November 26, 2012

floor yourself.

It occurred to me that, due to my extreme kitchen update delinquency, I can't detail any more of the projects we've completed without giving away one of the most dramatic changes: the flooring. I want to show you pictures of so many things - the pantry! The counters! The everything! - but in the interest of maintaining some semblance of a timeline, I'll pick up sorta where I left off. 

Truth: I was leery about the floor installation. So leery that I procrastinated like mad...from early June's base cabinet installation all the way until mid-August, when it was Just Plain Time to get the big projects done. I understand my hesitation, given the streak of 100-plus-degree weather that hit in June/July, as well as the size and impact of this specific project. It's not like cabinet hardware, which can just be exchanged, or picture placement on a wall, which can be adjusted. No, this is big-time, in the same league as countertops and cabinet paint color - i.e., Could Theoretically Be Changed, But OMG That Would Suck/Be Expensive/Kill My Already-Flagging Kitchen Mojo.


Nice, yeah, mm-hmm, but the flooring GOTS TO GO.

To my delight, the flooring install was surprisingly low-key, dummy-proof, and quick. We were (wait for it...) floored. Yeah. Yeah, I said it. Don't pretend you didn't like it. Pun away with me, baby.

Now the deets, AKA The Top 10 Things That Floored Us About the New Flooring:

10. Installation was a snap. We went with vinyl peel-and-stick tile after briefly considering Pergo and cork flooring. I wanted something durable, but I also wanted something that was, like, Level 1 DIY, along with being inexpensive. Vinyl peel-and-stick FTW! And specifically, Style Selections 12"x12" Patina Shale Slate Finish from Lowe's FTW! I found this option all the way back in January, but I wavered for months before making the purchase. So glad I chose it. Best part? Installation actually was as easy as the Internet claimed it would be. Know how many times that's happened in this kitchen reno? Once. WITH THE FLOORING.


source: www.lowes.com

  9. In fact, it was so easy that even though we had 200+ square feet to tile, it was 85% done in two days. Well, three, if you count the half-hour it took on Friday night to prime the laminate floor. We did consider trying to pull up the laminate sheets, especially after the dire warnings from the dude at Lowe's, who insisted that the vinyl tiles would be peeling within HOURS if we applied them to the laminate. However, there were asbestos and logistical concerns related to removing it...so we just primed the laminate and crossed our fingers. Anyway, 85% took a half hour of priming plus two days of measuring, peeling, and sticking - with the help of my mother-in-law on Day One, and with J.J. working his butt off on Day Two to install the new shoe moulding. The other 15% happened the following weekend; I waited for the already-laid tiles to set before pulling out the fridge and range to tile underneath. Then we were done!


85%, muthas!

  8. Yep, 100% done in two weekends! ...Except for one little corner of the bathroom. We needed to remove the toilet, lay the flooring, and replace the toilet. Now, if it seems like we just removed and replaced the toilet a few short months ago, that's because WE DID. Trust me, it made the prospect of doing it again that much less appealing. So, three months after we peeled and stuck everything else, the Corner of Shame remained...until this past holiday weekend. With the threat of guests coming over on Saturday night, we got our butts in gear and finished in about an hour. I'm telling you, if you ever need motivation to finish a house project, invite people over.


Don't worry - the grody brown stains around the
Hole of Doom are just rust stains from Stinky Pinky.


  7. I actually found edging pieces that were both a complimentary color and made of vinyl, which makes the stair edge not quite as deadly as before. I mean, it's still going to rattle your noggin (read: split your forehead) should you fall on it, but maybe less so than the metal edging would have? Let's hope we never have to test that hypothesis.


Heavy metal, livin' on the stair edge.


Another official "before", with the metal edging removed.


After! The edging is from Home Depot.

6. I didn't have to dash to the hardware store 93789 times to get forgotten/unforeseen items. This is nothing short of a miracle, as far as my kitchen-reno-mind is concerned. Other than severely miscalculating how many boxes of flooring we would need (meaning I did have to run back to Lowe's for a few more boxes - who taught me to do math, anyway?), there were no major surprises.


 5. We could have run into major problems with the transition/edging pieces between the front hall and the kitchen and at the top of the basement stairs, but? Nope, no problems at all. We were able to use the existing pieces for both. UNBELIEVABLE. There was a gray rubber transition between the front hall and the kitchen that we were able to lift enough to slide the tiles under, and the metal edging at the top of the basement stairs was doing its job just fine (and is less of a forehead concern than the main step in the family room), so I just removed it, laid the tiles, and replaced it. I think I have an extra piece of the vinyl edging hanging around that I could hammer in, so maybe I'll tackle that someday. You know, for funsies. In the meantime, totally acceptable.

The rubber transition piece blends right in. Swoon.

4. In terms of durability, so far, so good - no peeling, and it doesn't show dirt or grime easily. That was one of my main goals for the flooring, considering that the kitchen is the literal center of the house. Pretty much anyone who enters our house (save for pushy creepy solicitors who elbow their way in I invite in while I write them a check) will pass through the kitchen, and I don't want to have to worry about whether they take their shoes off or not - or whether I've swept the floor in the last few days weeks.

  3. But, bummer city - and this is my only complaint about the floor - it shows even the slightest of scrapes. As in, I don't remember dragging a heavy body with knives poking out of it across the floor, but apparently, the vinyl remembers. The vinyl never forgets. Note to Dexter Morgan: Watch yourself around the peel-and-stick. I've already made peace with the scuffs, and it's not like the veneer is tearing off or anything, and no one has noticed it but me, AND I can't even really get a picture that captures the scrapes...but it's still a bummer.


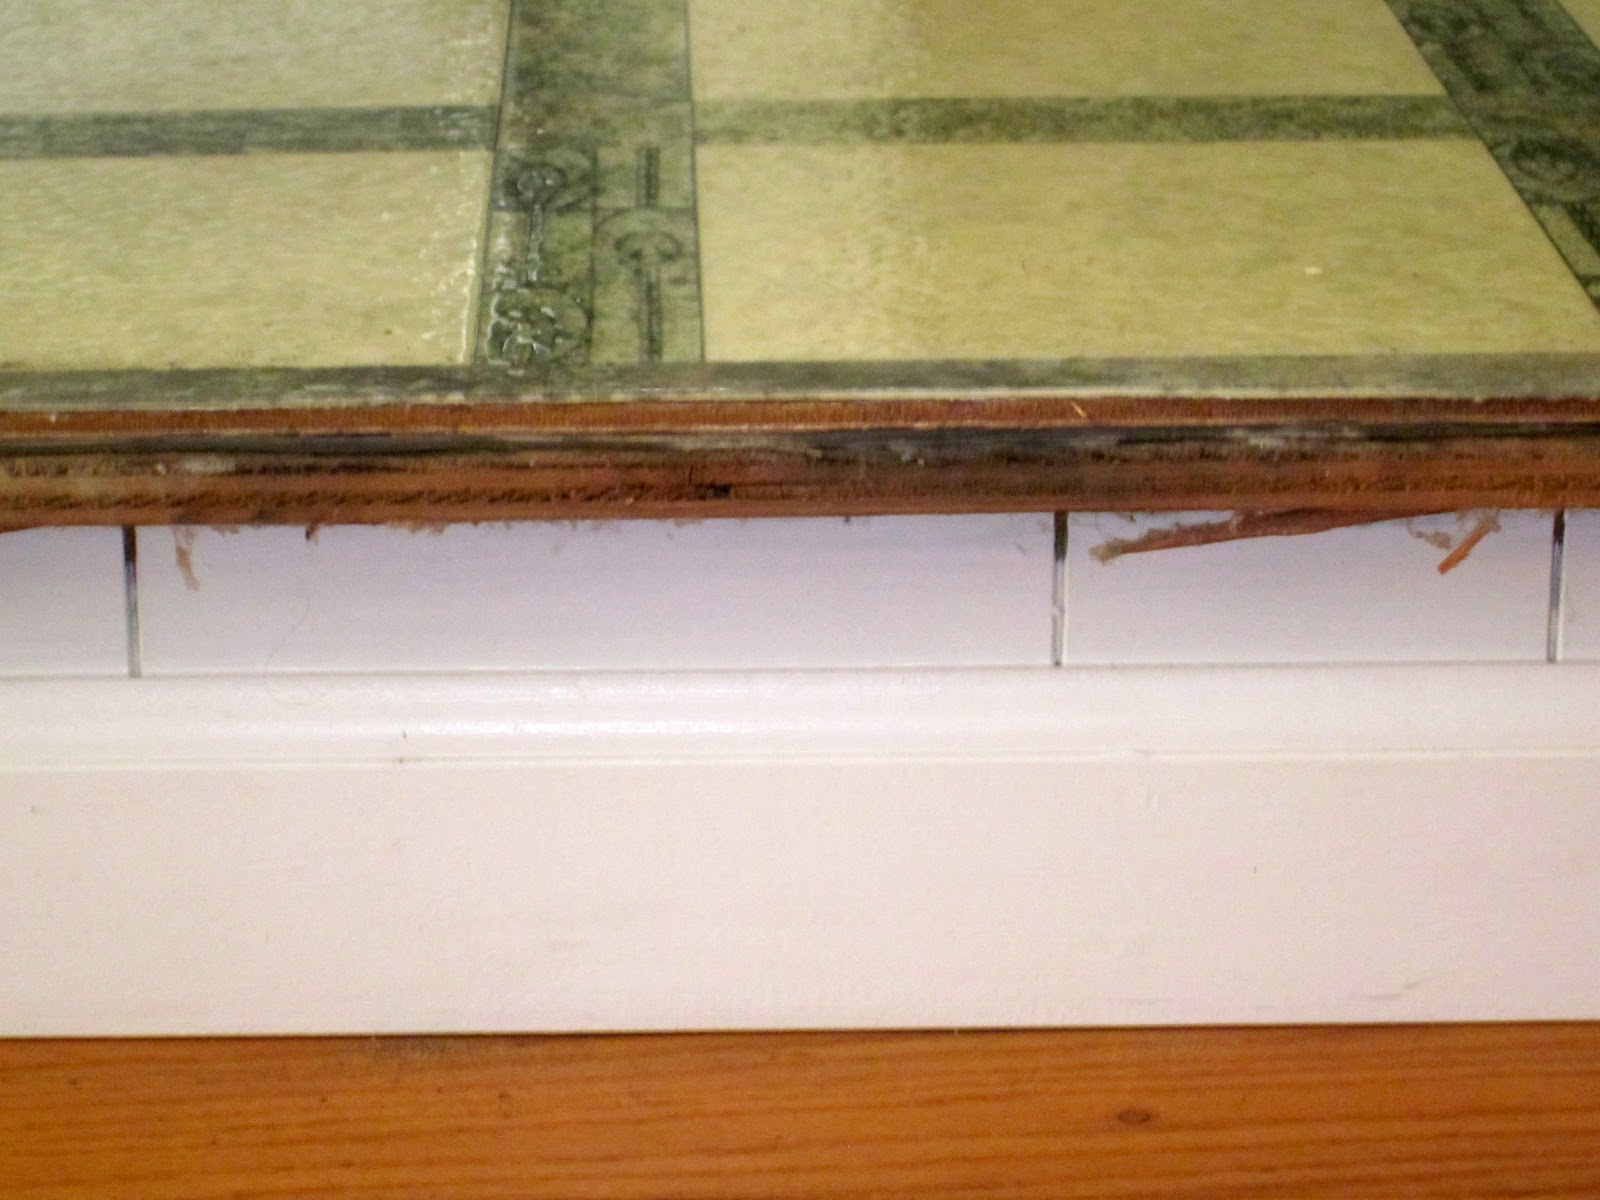
  2. I found the spot where All the World's Spiders now lay their eggs: under the stair edge between the kitchen and the family room. And then I removed the egg sacs. All of them. ALL THE EGG SACS. Along with the splinters/Wood Chunks of Death that weren't quite covered by the new, slightly shorter edging pieces. The stair is now spider- and wood-chunk-free. (And All the World's Spiders have retreated to our crawl space, where they're covertly scanning the current location of my pillow.)


And, finally, the #1 Thing That Floored Us About the Flooring...

  1. What a huge difference it makes! Initially I was worried that the dark shade would close in the room, make it seem smaller, and/or clash with some other adjacent color, but no. The kitchen instantly felt bigger, more modern, more luxe, and more pulled-together. It also flows better with the adjacent rooms. One (the entry hall) has dark-toned slate tiles, and the other (the family room) has medium-brown hardwood. The brown vinyl is much less jarring than the white-and-green squares, not to mention more aesthetically versatile. Hands down, the flooring was the biggest game-changer since painting the cabinets.


Flooring = WIN. And - oh, what's that, now? You noticed a curvaceous addition above the range in this shot? Ah, yes. Deets on that sexy lady very soon! Aaaand now Gangnam Style is in my head. Aaaand now it's in your head. You're welcome.

Sunday, April 29, 2012

maybe don't do it yourself (part II).

Ah, oui, part deux of the downstairs bathroom debacle saga, in which I officially proclaim IT IS DONE (except for one tiiiiny thing that can't be done until later).

When I last left you, dear readers, the bathroom was looking like this:


Three things here just weren't cutting it for me: the light fixture, the blinds, and the medicine cabinet. All were fine in theory...but they didn't match the updated decor, you know? I'm happy to say, though, that these three projects ended up being relatively easy - even though two had unforeseen complications, and the last one I took on - the medicine cabinet - ended up being the reason that the bathroom didn't get finished until this weekend.

I started with the light fixture. I bought a new one (oil-rubbed bronze, woo!) and thought, I can do this BY MYSELF like a big girl. The maybe-not-so-bright (bright...ha, light pun) idea was doing it while I was home alone. I did warn my co-workers before I left for my lunch break that I'd be tackling electrical work, so if I didn't return in an hour, call 911. So, you know, precautions were taken. And, probably way more important than alerting my co-workers, I remembered to turn off the electricity.

Removing the old fixture was a piece of cake. I even paid attention to the wires to inform my re-wiring process, which ended up being crucial. Way to go, Cath.


I patched and painted the wall where the fixture had been, since the new fixture has a smaller base...


...and set out to re-wire the new fixture, even though I'm afraid of touching wires when I'm home alone.

<INSERT SQUEALY BRAKE NOISE HERE>

And here, kids, is where I learned all about "ground wires" and their function. After quickly realizing that there were two wires coming out of the wall and three places to re-attach wires to the fixture, I turned to my favorite DIY teacher, YouTube. That's where I learned that the copper wire grounds the fixture, which means my house won't burn down and die if the fixture short-circuits (...um...that's roughly what it means...how about don't quote me on that). This all happened two months ago, so I can't really remember the deets, but I'm pretty sure the new fixture came with a copper wire attached, and I found a way to hook it all up correctly. Unless that means my house is in imminent fire danger. In that case, I did something else way more electrically gooder. In any case, I ended up with this:


I also ended up with this, because like I mentioned before, karma is feisty and screwdrivers are wily.


The two scratches on the drain are from J.J.
The two chunks missing from the porcelain are from karma.

I mostly fixed the chunk debacle with white waterproof caulk, and everything was looking pretty good. Pretty done. But then...I started looking at pictures. Aaand after perusing all these pictures, I decided I hated the blinds.


I don't really know why. It's just that I tend to be a minimalist, and the blinds aren't serving any function thanks to the frosted lower window, and we have never, ever lowered them in the 2.5 years we've lived here, except to take that picture. So why keep them? Presto-chango - they're gone now. It took all of 10 minutes - I lifted the blinds off their brackets, unscrewed the brackets from the wall, patched, sanded, painted, and was done. Woo. Easiest project yet, but no one even knew they were there (including J.J.), so it's also the least noticeable.

On to the medicine cabinet. It was a little crooked, but it was the silver frame that was really bugging me. Yeah, that's just how picky I got in this tiny, tiny room. But really, it wasn't jiving with everything else.

My first plan was to DIY a frame (side note: it is unacceptable to use "DIY" as a verb, and I apologize). I thought I could just glue white moulding to the existing mirror, which would simultaneously tie it in with everything else and give it the illusion of being level, because I would trick the eye by making the frame level. I bought moulding for, like, three bucks, measured stuff out, cut a few pieces, and promptly made a cut at the wrong angle, which left me with not enough moulding to finish the project. I bought more moulding, but somehow? The materials have been sitting in the corner of the tiny bathroom, untouched, FOR THE LAST TWO MONTHS.


I kind of got sidetracked by the kitchen stuff. In the end, though, it was the kitchen that brought me back to the bathroom (don't read into that sentence too much). See, I've been on vacation this week. I spent last weekend in Las Vegas with my entire family of origin (minus one), and, since I returned on Monday, I've been loathe to do anything kitchen-related, despite grand plans to "pretty much finish the whole thing this week!" What was I saying in the last post about estimated time having an inverse relationship to actual time? Yeah. Regardless, I spent Wednesday working on the kitchen and six hours on Thursday shopping for the kitchen (which was harder than it sounds), and by Friday, I was burned out on the stupid kitchen. If I were tending to my mental health, I would have allowed myself the rest of my vacation for relaxing. But...I'm not being a good caretaker, and the cracks are showing, and I'm forging ahead nonetheless.

Not with the kitchen, mind you. Nope - I've taken procrastination to a whole new sad level, wherein instead of working on the kitchen, I returned to the bathroom to finish off the medicine cabinet. After all the mind-numbing detail work I've been doing in the kitchen, I just couldn't stomach doing the frame for the cabinet. I know it sounds dumb, and maybe wasteful, but when I thought about purchasing a new cabinet rather than spending hours measuring and cutting and gluing and waiting...only to have a semi-okay final result? No way. Couldn't do it. So I bought a new one. Judge not, lest ye end up in a similar bathroom debacle.

Of course, this didn't necessarily make things easier or take less time. I'd made a decision, though, and it was less mental work to follow through on it than to back out. Heehee. I don't pretend to understand, don't worry. 

First, I had to cut out the glued, screwed, and caulked old medicine cabinet.


I cringed as I pried the cabinet out of the wall, for two reasons. First, as you can see in the picture above, the paint and drywall around the cabinet tore and came up in chunks, which equals more spackling, sanding, and painting...which I am so. sick. of. Second, this is a recessed medicine cabinet. As in, there's a hole in the wall behind it. Would squirrels jump out at me? Would I discover a spider colony worse than the one in the kitchen? Would I finally discover where all those razors go when people shove them in the little hole in the back of the cabinet?

Luckily, the answer to all three of those questions was no. BUT. I was home alone, and I may or may not have squealed out loud in utter terror as I was pulling the cabinet out of the wall. ANYTHING COULD HAVE HAPPENED. Anything. But then, by the grace of the DIY gods, the cabinet was out, and the resulting hole was relatively clean and spider-free.


In that picture, as you can see, I had already spackled the perimeter. I ended up having to spackle, dry, and sand twice to really fill in the gaps, but it paid off - it's pretty smooth. I painted and left it to dry overnight. No way in hell was I going to let the wall-squirrels and ghosts invade my bed and my ears during the night, though, so I took precautionary measures.


Don't laugh. It worked. My sleep was squirrel- and ghost-free. And the next day, I installed the new medicine cabinet (set it in the hole, messed with it until it was level, screwed it into the wood frame) and was done.


DONE!

Done with a room!

(Except for the floor. But that's happening when we do the kitchen floor.)


Summer 2009


April 2012

Since we moved in, we have:

  • replaced the window (including a frosted lower pane)
  • painted the walls yellow and the trim white
  • removed all the wooden fixtures and replaced with bronze ones
  • hung art on two walls
  • replaced the toilet and sink (added a cabinet)
  • replaced the light fixture
  • removed the blinds
  • replaced the medicine cabinet
We've spent about $400 in this tiny room, not including the paint (which was part of the whole first floor being painted), the window (which was done when we got all the windows replaced), and the art (the metal circles were a gift; we had the frames - from Target - already). Not bad for a complete overhaul, especially since we replaced a water-guzzling toilet with a low-flow one. Here's the breakdown:
  • Trash can/towel hook/toilet paper holder: ~$20
  • Toilet: $200
  • Vanity: $42
  • Faucet: $47 (+ ~$20 for random parts)
  • Light fixture: $45
  • Medicine cabinet: $25
  • TOTAL: $399


Some more "after" pics:


I'm calling it done, officially.

(Until I magically come into a huge amount of magical money that allows me to magically build an addition over the garage and off the back of the house...in which case, this bathroom will be relocated. <Evil laugh>)

Saturday, April 28, 2012

maybe don't do it yourself (part I).

I think...a room in my house might be officially finished.

No, it's not the effing kitchen, thanks for asking.

It's the downstairs bathroom.

It started out looking like this when we moved in:


Those are all the "before" pictures I have, but I think the point is conveyed: This was...not a pretty room. Salmon-colored fixtures (to match the exterior siding? Who knows), faux-wood hardware, crooked medicine cabinet...All in all, bad news.

I replaced the hardware with oil-rubbed bronze pieces (the towel bars, toilet paper holder, and trash can) and put a new white vent cover on pretty much immediately after we moved in. When we did the major interior painting two years ago (and by "we" I mean "a dad from my work who's a professional painter"), the bathroom transformed into SUNSHINE IN YOUR FACE FLASHY CLASHY CITY.


Salmon pink + sunshine yellow = not so much.
I wanted to wait until we did the kitchen remodel to replace the sink and toilet (for masochism's sake? I don' t know), but I did add some art about a year and a half ago - two metal-circle pieces that we got for our wedding (from...Crate + Barrel, I think) placed side by side, and a frame wall with some of my favorite quotes. Because you gotta have something to read while gracing the salmon throne.


I meant to rotate out the quotes with new ones periodically, but eh, intentions. And speaking of intentions, the rest of this restroom sat unchanged for a long time after adding the art. Like...until a few months ago, when we finally replaced the toilet and then the vanity.

I would link to the blog post about replacing the vanity, but? There isn't one. Because it took almost a month, when all was said and done, and I was so bitter about the whole process that writing about it just never happened. And then I was all, "Oh, I'll just post about it after I replace the light fixture," and then I broke the new sink replacing the light fixture, so I was all, "Eh, I'll just post about it after I update the medicine cabinet," and that brings us to TODAY.

The vanity, the vanity. I went back and forth about replacing the wall-mounted sink with either a pedestal sink (more stylish, leaves more space in a tiny bathroom) or a cabinet/sink combo (more functional to store crap that we actually don't even have yet, like - I don't know, diapers or something? It made sense at the time). I ended up going with the cabinet/sink combo.


$40 from Home Depot...score.
I liked the look, it was a good size, and I could add bronze fixtures to it (most sinks I saw came standard with stainless steel...but I wanted oil-rubbed bronze).


$35 from Amazon...almost as much as the whole vanity. Whatever.
Pieces and parts secured, all that was left was to follow the instructions to remove Pink Sink and install the new stuff. So I read through the instructions, followed them diligently, and was done a couple hours later.

NOPE. Rewind. The vanity? Came with instructions. ("Remove your old stuff. Screw this thing into the wall. Done-zo.") The faucet? NO INSTRUCTIONS. I'm guessing this is because it's just common sense plus basic plumbing know-how, but sometimes I'm lacking in both of those departments, so it turned into a epic struggle. My brother happened to be over one afternoon, and he kindly helped us remove Pink Sink (glued, screwed, and caulked to the wall, just like everything else in this freaking house, including towel hooks).


I even removed the base moulding and cut it to size so the new vanity would sit flush against the wall (ha...flush...bathroom humor).


I figured all we'd have to do is re-attach the pipes. I tried it myself one day when J.J. wasn't home - that's how easy I thought it would be. But because my assumption of difficulty level tends to have an inverse relationship with the actual difficulty level, chaos ensued, and I couldn't do it on my own. PLUMBING CONFUSING. Plus, we needed an extension pipe, which was way beyond my DIY capability patience level at that point. J.J. and I tackled it together when he got home, and then over the course of the next couple weeks, but I'm telling you - we watched YouTube videos, we thought things through, we fought things out...and nothing worked. His dad looked at it. Our brother-in-law looked at it. We took it apart again and again. Basically, the pipes kept leaking, despite everything we tried. I don't even have pictures of this process; that's how annoying and frustrating it was.

And. J.J. scraped the new drain plug while trying to fix it. Right after I told him to be careful NOT to do that. I was mad at him until I dropped a screwdriver a few weeks later (while installing a new light fixture) and chipped the shit out of the sink. Wonk-wonk. Karma...she's feisty.

In the end? J.J. wrapped plumber's tape around the *outside* of the pipe extension connection, the leaking stopped, and we had a functioning vanity. (Don't try this at home, kids.)


So - before, during, and after:


And there's more to come! I've since replaced the light fixture and the medicine cabinet (after half-ass attempting a DIY fix), and I removed something that had been bothering me since day one. But this post has ten million pictures already, so I'm saving those for next time. I know you can't wait. Here's an ugly "before" to entice you.


Saturday, January 28, 2012

congratulate yourself.

Dear Self,

Congratulations on pulling the damn trigger already. Now you have a fancy new toilet!

Ye olde potty.
La new toilette!
I'm actually not totally in love with it yet, and not because it's only a toilet. I think it's just the aesthetics - it has a cheap, fugly toilet seat, and the tank is just so...small. It's one-piece, too, which is just different from what I'm used to. That said, we're learning to love each other. The good news (besides the water savings, thanks to the 1.28-gallon tank) is that there wasn't any evidence of 50-year-old leaks or anything - the wood floor that we could see beneath the linoleum, around the flange (my new vocab word of the day), was dry as a bone and in perfect condition. Let's hope it stays that way!

We got help and moral support from our friend (and ex-next door neighbor), Chad. J.J. once helped his brother replace a toilet, but neither of us was really confident in our skillz. After hearing a slew of comments along the lines of, "Replacing a toilet is easy! Just don't forget to [clean the flange / measure the bolt distance / not lift the toilet to adjust after you put it down / etc.], or else you'll [have wicked basement leaks / flood your house / rue the day / etc.]," I thought we should call in reinforcements. Chad offered and was available this afternoon. Done.

This toilet has no idea what's about to happen. :(
Looks super awesome paired with Pink Sink, yeah?
While emptying Stinky Pinky in advance of removing it, I thought back on all the memories: My sister claiming there were invisible splashback remnants from the previous owner caked on the underside of the old wooden seat...replacing all the bathroom fixtures EXCEPT the toilet and sink in 2009...the Great Norovirus Attack of Fall 2010....

Now it's time to make a decision on the vanity. Needs to be as inexpensive as possible (which definitely means we'll be installing it ourselves again). And I need to find a disposal method for the old toilet. Guessing it won't really fare well on Craigslist (though, might give it a try: Vintage Pink Porcelain Wonder, anyone?); Chad wasn't sure if the Habitat ReStore would take it, since it's low-efficiency. Also? Looking to make some decisions on flooring for the kitchen/bathroom area:


A distinct possibility!
But for tonight? Purchase, transport, removal, installation, proper function. Yay! A win.

SHARE ME

Related Posts Plugin for WordPress, Blogger...